Are you feeling stuck with the old permalink URLs of your WordPress site? Are you terrified to change the permalink structure in WordPress because of the fear of losing search engine rankings?
Have no fear, here is a step by step guide to change the permalink structure in WordPress; and do not worry about SERP rankings, switching permalink URLs is totally safe.
I have learned about on-page SEO at the later stage of my online blogging career. And like many of you, I had already published quality blog posts before I learned about the SEO Optimization.
If this situation sounds familiar to you, then I am sure that the one and the only thing that make you feel stuck in your progress is “How to take care of old permalink URLs in WordPress?”
Let’s assume that you had tried modifying the post slug/URL of your blog’s old posts, and you might have to stumble upon 404 error and few other problems too. How to Overcome all those problems?
Here is a guide with tested solutions to safely change the permalink structure in WordPress from old post URLs to new post URLs.
Before you dig into the solution, first learn What is the SEO friendly URL structure in WordPress? This will help you drive more traffic to your blog from the search engine.
One more guide for setting up and configure Yoast SEO WordPress Plugin will also help you make your old post SEO friendly, and undoubtedly you will continue to get quality traffic.
Basic Things to Understand Before Changing Permalink Structure in WordPress
Let’s learn some basic things and terms which you must understand if you are using a WordPress site.
What is “Slug” in WordPress?
The post slug in WordPress [1] is the user-friendly URL that is a valid name of the post. This is the most common feature in WordPress. It is used to create a permalink of each WordPress post.
Generally, WordPress automatically creates this post URLs/slugs using the post title. When WordPress create a slug from the post title, it basically follows three main rules:
- Convert title into lowercase.
- Replaces the spaces with dashes/hyphen.
- Removes special characters and symbols.
It isn’t used in the URL structure till custom permalinks are enabled for the use of “%postname%”. But once you enable it, the post URL will appear below the post title on the Post Edit screen, as shown in the below image.
However, if the title of your post contains stop words, then the default slug will even include those words. Those words are useless and not suggested when you are optimizing your posts for particular keywords.
Stop words are very common words in the post title filtered by the search engine in a query. Those words can be a, an, are, and, the, by, both, on, of and so many others.
Assuming that you have understood this basic thing. This is now time to go for the solution of our issue to change WordPress permalink structure without losing rankings in SERP.
How to Change WordPress Permalink Structure Without Losing Rankings
To modify the permalink URLs of the old post in WordPress while keeping ranking as well, there are five easy and straightforward steps that you need to follow.
Step #1. Create A List Of Current Permalinks
Before you start changing the permalink structure of blog posts, you will require creating a list of those old posts URLs. This will be useful when you set up 301 redirects and make sure that no URLs have been missed. There are two different ways to generate this list.
List All URLs WordPress Plugin [2] can help you to complete this task. This is a simple and lightweight plugin that creates a comma-separated list of all the WordPress post URLs.
Install this plugin by visiting the WordPress dashboard and here in the Plugin tab → Add New, look for List All URLs Plugin. Click on Install and Activate it.
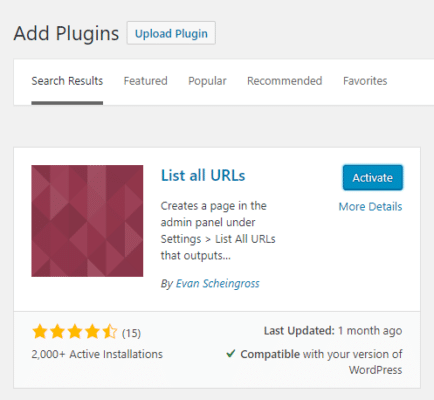
After installing and activating it, a new menu item will be added to Settings → List All URLs from that page, get a list of post URLs in CSV format.

Step #2. Update WordPress Permalink Structure
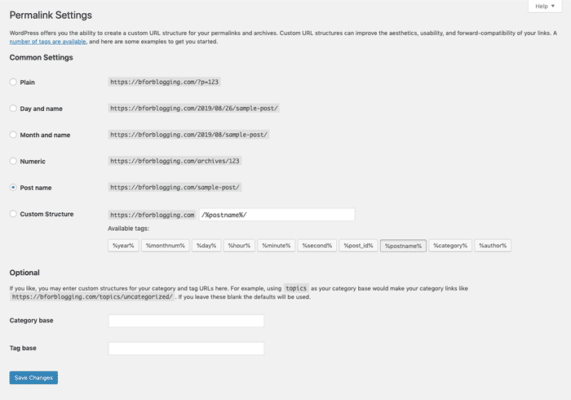
When you have the list of old permalink URLs in hand, it is now time to update the permalink structure. Update the permalink structure by visiting Settings → Permalinks, and select the preferred new structure for the new URL, then just click on Save Changes.
You can choose any WordPress permalink structure as per your requirement. However, if you are not sure about which permalink structure is a good fit for your WordPress site.
I would suggest you choose Post name if you have a blog. You may read our guide on Best WordPress SEO Friendly Permalink Structure for more details.
Step #3. Setup 301 Redirection In WordPress
Now, as you have changed the permalinks structure of old posts. You will be required to setup a 301 redirects for each and every old permalink to the new permalink.
There are a few different ways to create 301 redirects. Any technique you use is fine, just make sure you don’t miss any of the old post permalinks when you are creating redirects.
Because if you don’t create proper redirects, then there are few poor things can happen:
- Any internal links, which are created manually will not be updated and will surely break.
- Any external links that reside in those updated posts will send the traffic to your 404 pages rather than send them to the appropriate post.
- Even the next time Google search engine crawls those old post URLs, it will report back about 404 errors and drop those pages from SERPs.
So basically proper setup of 301 redirections of the old posts permalinks to the new permalinks is the essential step in this solution.
How To Use The Redirection Plugin to Set up 301 Redirections
To set up 301 redirections you can use Redirection plugin [3] to create the redirect rules. Just install this plugin, once you had installed and activated this plugin.
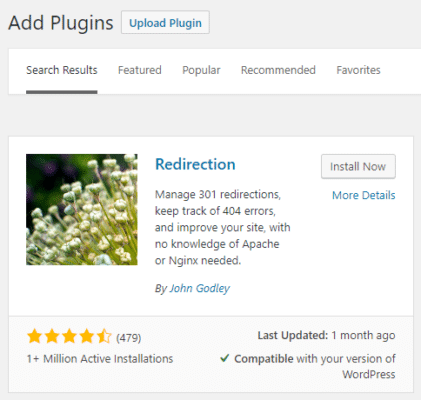
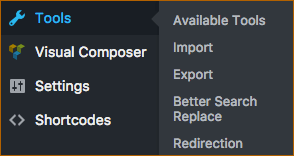
Now go to WordPress Dashboard → Tools → Redirection and find Add new redirection option in there.
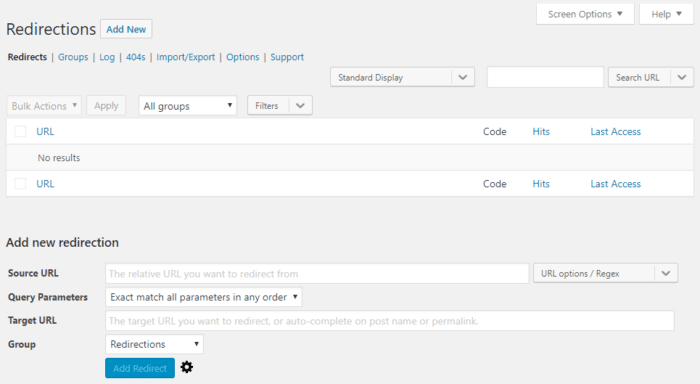
Here type in or enter the old URL in the Source URL box and new URL in the Target URL box. Then click on Add Redirection button.
This is it! Your old post permalinks will be redirected to the new post permalinks.
With the 301 redirection setup, you can do two very basic things as to test out the redirection rules:
- First, manually create the list of old permalink URLs to ensure that the redirected accurately to the new URLs.
- Then, find a few of the old post URLs in the Google search engine and ensure that the links are correctly redirected to the new URLs by you.
Once you have verified all of the old posts’ URLs are redirecting as you have expected, after then let the search engine spiders find your new URLs to index them.
Step #4. Fix Internal Links After Changing WordPress Permalink Structure
You can’t change the outbound links of your blog post, but you can easily change the internal links. To fix the internal links can take a little time to find the links and then change the URL.
However, it worth your time. Because this helps the search engine bots to find your new URL of the old post and index it quickly.
You can find the internal links to a URL by login to the Google Search Console and choose the site. Then visit Links → Internal Links and click on more.
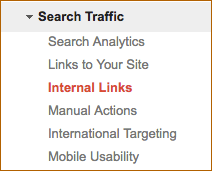
This will help you find the top internally-linked pages, now click on the download button to export the internal links.
Make sure you ignore the pages such as category, tag, etc. Just go to the single post and update the old URL. Correcting internal links makes this easy for search engine bots to index your site and rank the right page.
Step #5. Take Advantage Of “Fetch As Google” To Index Your New URL Faster
Once after you change the URL, bots will take the time to crawl the URL and index it. To make it easier, you can submit your updated URLs for indexing to Fetch as Google. This is the option that resides in Google Search Console.
To find this option, visit Google Search Console and choose the domain name. Then expand the Crawl menu and click on Fetch as Google link. Here enter the new URL of the post to the input field and click on the FETCH button.
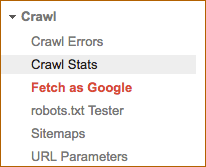

Once after completing fetch status, tap on the Request Indexing button. Then choose Crawl only this URL and click on the Go button. Then your new URL will be indexed by search engine very soon. Sometimes this happens under 5 minutes.
What will happen if someone will click on your old URL? They will automatically be redirected to the new URL. It would make sure you wouldn’t lose any traffic after modifying already published post URLs.
However, remember one thing that you would lose your social media share numbers, and it is quite a little trade-off you require to make when dealing with changing old post URL.
Points to Remember When Your Are Dealing with Changing Already Published Posts
- This is fine to change old post permalink URLs as long as you are setting up 301 redirects.
- You won’t lose any traffic from the search engine once after changing the old post permalink URLs and performed 301 redirects.
- However, you would lose the social media share as the old post link edited.
- This is not suggested to edit the URL of the high ranking blog post.
Wrapping It Up
You can now definitely practice this for all your future blog posts. At the same time, you can start changing the old post URL for the non-performing posts.
Ensure that you follow all the above-listed steps so that you also won’t lose the rankings of the posts.
So, do you find these tips to change the permalink structure in WordPress without losing your SERP rankings helpful?
Or you might have any other recommendation to change WordPress permalink URLs, feel free to share your thoughts in the on the same, we’ll try to incorporate it in the post.
If you like the article, do share it across social media channels with your friends and keep spreading the good word!
Share your feedback and feel free to ask us by commenting below.
Stay tuned for more of such updates on Facebook and Twitter.
More to read –
